The Montessori Touch Tablets material is one of the first sensorial materials a child will work with in a Montessori classroom.
What is this material, though? What is the purpose of using the Touch Tablets in sensorial activities?
In this article, you will learn what the Touch Tablets are and how to use them to help a child develop tactile discrimination, one of the 9 senses Montessori focuses on.
(This post contains affiliate links. Purchasing from these links costs you nothing extra, but helps with our website upkeep.)
What are the Montessori Touch Tablets?
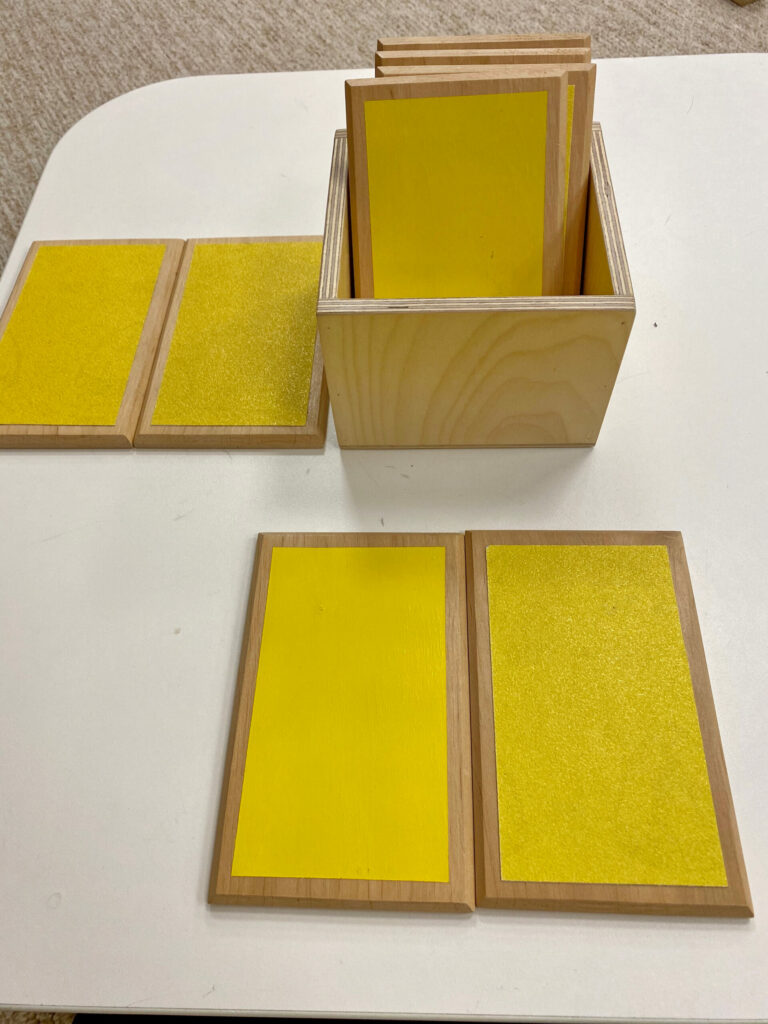
The Montessori Touch Tablets material consists of 2 sets of wooden tablets; a rough set and a smooth set. Both sets of tablets are graded in texture; from rough to roughest and smooth to smoothest.
The Touch Tablets allow children to pair and grade by both touch and sight. The goal of this material is to help refine a child's tactile sense.
Since children in Montessori use their hands for everything from math to language arts, establishing a good tactile sense is very important.
The set in the photo link below is the rough Touch Tablets only. If you are looking to introduce these in your home, this will suffice.

- 🌱【Sensory Development】: The Montessori Touch Tablets…
- 🌱【Fine Motor Skills】: These touch tablets are excellent…
- ✨【Sensorial Education】: The Montessori Touch Tablets…
Purpose of the Montessori Touch Tablets
- tactile discrimination of smooth and rough surfaces
Indirect aims
- control of movement
- visual discrimination
Control of error
- the feel of the tablets
- seeing the textures
Points of interest
- the variations in color
- the variations in textures
How to present the Montessori Touch Tablets
Note: You should accompany the child to wash hands prior to beginning this activity.
- Carry the Touch Tablet box to the table and put it in the upper left corner of the child's workspace.
- Explain to the child that you will be matching the tablets according to their textures.
- Remove the roughest tablet from the box, place it in front of the child, and stroke it lightly from top to bottom twice.
- Ask the child to do the same.
- Remove the least rough tablet, place it in front of the child, and stroke it lightly from top to bottom twice.
- Ask the child to do the same.
- Take the other least rough tablet from the box and ask the child to feel it in the same manner and say if the 2 tablets are the same.
- Verify that the 2 tablets are the same and move them toward the top of the workspace and side-by-side. (If the child was incorrect, invite them to try again.)
- Remove the 2nd roughest Touch Tablet from the set and ask the child to feel it in the above manner and say if it is the same as the first tablet.
- Verify that the 2 tablets are the same and move them below the first set of tablets.
- Scatter the 4 tablets on the table and invite the child to try matching the tablets on their own.
- If the child is successful with the roughest and least rough pairs, introduce the middle pairs in the set one by one.
After the rough set of Touch Tablets has been mastered, you can introduce the smooth set if it is available.
Touch Tablets extension activities
- Perform the activity as a stereognostic exercise (blindfolded or with eyes closed)
- Ordering the Touch Tablets by texture – roughest in the set to least rough in the set, ect.
This neat material is so simple in its concept, but it can enhance a child's learning throughout the early childhood years and beyond.
Cheers and don't forget to subscribe!