Montessori sensorial materials aim to refine all of a child's senses, including their auditory sense. One of the most beautiful sensorial activities a child will engage in at a Montessori primary school is the Montessori Bells.
In this article, you will learn what Montessori Bells are, the purpose of this material, and how to present the lessons to a child.
You will also learn about some alternatives to the Montessori Bells, as this is quite an expensive material.
(This post contains affiliate links. Purchasing from these links costs you nothing extra, but helps with our website upkeep.)
What are the Montessori Bells?
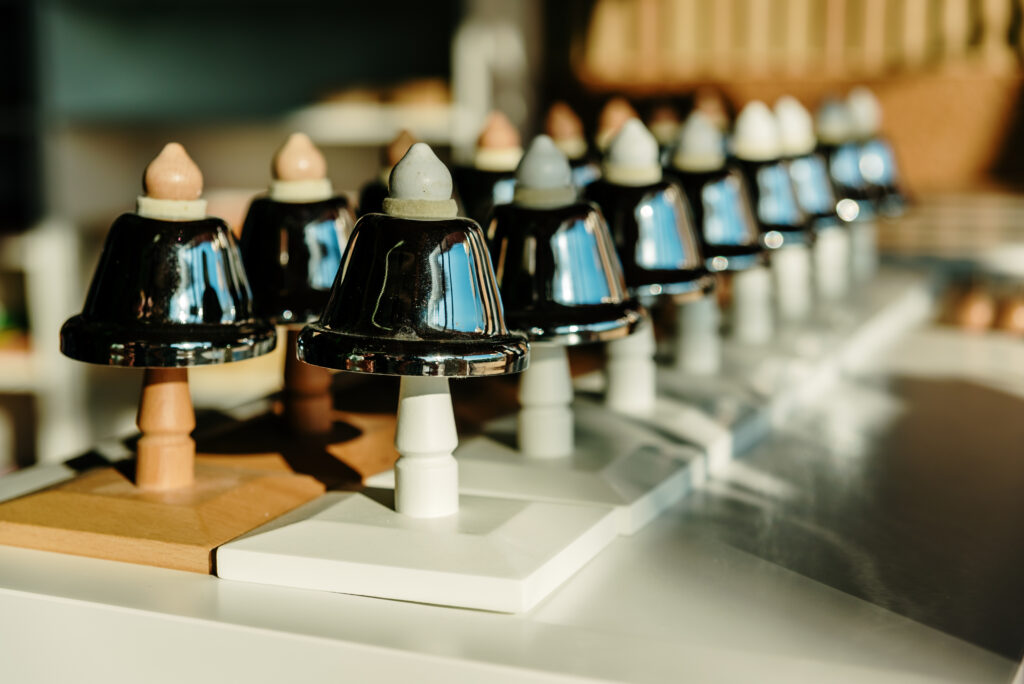
The Montessori Bells material consists of 2 sets; a control set and a working set. There are a total of 26 bells; 13 bells in each set.
The bells start at middle C and travel up the chromatic scale a full octave.
The control set of bells has bases colored black and white, which match piano keys. The white bells are natural notes and the black bells are sharp and flat notes.
The working set of bells has all wooden (brown) bases and contains all the same notes as the control set.
A small wooden mallet called a striker is used to strike the bells and a small cloth-covered dowel is used to dampen the sound. These are typically stored in a small basket near the bells.
The control set is kept, in order, toward the back of the shelf and the working set is kept, in order, directly in front of it.
The purpose of this material is to help children develop auditory discrimination, which is the ability to recognize the differences in sounds.
This is an important sense to refine, as it plays a role in literacy.
When a child can discriminate between sounds, they have better speech perception, which means they can better detect the differences in phonetic sounds.
This material is also helpful for learning musical concepts and developing an appreciation for music and other sounds.
Where to buy
Affordable Montessori Bells are not easy to find. Nienhuis has a set that is high-quality, but the price is out-of-budget for most people. It's something a successful school might invest in.
Adena Montessori has a set that is much more reasonable. It does not contain the sharps and flats, however.
If Niehuis and Adena are both out of your price range, I have a couple of great alternatives down toward the bottom of the article, after the lessons.

- The montessori music Pitch Clock refine children's auditory…
- The montessori music Pitch Clock could develop children's muscle…
Vera Ligtelijn-DePass has a wonderful DVD that goes over the Montessori Bells presentations.
If you are set on investing in the Bells or their alternatives, it's a small extra cost that will help you make the most of the material.
Purpose of the Montessori Bells
- the development of auditory discrimination
Indirect aims
- fine motor development
- auditory memory enhancement
- preparation for future music studies
Control of error
- the control set
- stickers with the written note on the bottom of the bases (optional)
Points of interest
- the variety of tones
- the vibration of the bells
How to present the Montessori Bells lessons
Note: Only natural notes (no sharps or flats) are introduced in the lessons. Remove the sharp and flat bells from both sets and place them in a separate area, so as not to distract the child.
They will be introduced as an extension.
Caring for the Bells
Caring for work materials is emphasized in Montessori. The Montessori Bells require certain care to protect their sound.
As with many musical instruments, cheesecloth or other soft fabric is recommended for cleaning.
It may be tempting to the child, after working with polish for Practical Life activities, to polish these beautiful bells, but that should not be allowed as it can change their tone.
Carrying the Bells
Teaching a child how to handle the Bells is important before presenting the activities. If white gloves are available, they can be worn for this presentation.
- Tell the child that the bells can break easily and any damage to them might change their sound.
- Gently pick up a white bell by its stem using your dominant hand, placing your other hand under the base for support.
- Invite the child to assist you by bringing the damper and striker to the table.
- Carefully carry the bell to the table and gently set it down.
- Take the bell back to the shelf and invite the child to try.
Making sounds with the Bells
A single white bell is used for this activity.
- Using a pincer grasp, with your dominant hand, take the striker and tell the child what it is.
- Pick up the damper with your other hand and tell the child what it is.
- Using a slight motion of your wrist, lightly strike the bell with the striker and let the note stay.
- When the sound stops, repeat this step.
- Strike the bell again and use the damper to stop its sound.
- Ask the child if they would like to try.
- When the activity is finished, ask the child to carefully bring the bell, then the basket with the striker and damper, back to the shelf.
Playing a musical scale
This presentation should take place on another day after the child has practiced striking and dampening. The bells may be kept on the shelf if it is low and accessible, otherwise, arrange the white bells on the table in order.
Only the white set of bells is used in the activity.
- Place the bells in sequence from low to high and dampen them after letting them ring momentarily.
- Repeat this step while humming the notes.
- Repeat again while singing do, re, mi, fa, so la, ti, do.
- Ask the child if they would like to try.
Pairing the Bells
Both sets of bells are used in this activity. Again, this lesson can happen at the shelf, provided it is spacious and at a low height.
- Randomly place the brown bells toward the left side of the workspace and keep the white set of bells in their order.
- Place a single brown bell in front of the child, strike it, and hum the note.
- Find its match by striking each of the white bells. When you get to the one that matches, stop and place the brown bell in front of it.
- Check your match by striking each bell in the pair.
- Repeat this for each of the brown bells until they are all paired.
- Play the scale on both sets of bells to confirm you completed the activity correctly.
- Ask the child if they would like to try.
Grading by sound
Both sets of bells are used in this activity. Again, this lesson can happen on the shelf, provided it is spacious and at a low height.
- Place the brown set of bells along the front of the workspace in random order.
- Strike the white middle C bell and find the brown middle C by striking each one.
- Put the brown middle C in front of the white middle C.
- Order the bells now, only using the brown set.
- After you have ordered the brown set of bells, check your work against the white set by playing the scale on each set.
- Ask the child if they would like to try.
Montessori Bells activity extensions
- Introduce sharps and flats (Explain that sharp notes and flat notes fall halfway between natural notes and that a black bell can be both sharp and flat, as it is shared by two natural notes.)
What a beautiful material. Being a musician myself, helping children develop an appreciation of beautiful sounds really makes my heart smile.
This is a great material to invest in if you are opening a Montessori program, however, the price of an authentic set of Montessori Bells is more than a bit out of reach for most caregivers.
It is also a bit impractical to purchase this material if you are Montessori homeschooling. So, what are some acceptable alternatives to the Montessori Bells?
Montessori Bells alternatives
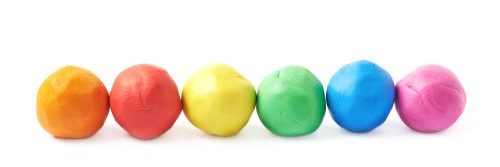
If you can't afford a set of Montessori Bells, the next best this to purchase 2 sets of diatonic bells. 2 sets of diatonic bells in the image link below work well, as they can be paired and graded.

- ♪MUSICAL EDUCATIONAL TOYS – Our 8 colour desk bells are marked…
- ♪PROTECT KIDS HEARRING – We use a tone difference of…
- ♪PREMIUM PACKAGE SET & BONUS 17 MUSIC SONGS – Set of…
If the one or sets of the above bells is still out of your price range, a set of colored diatonic bells works well for a certain level of auditory refinement.
The following set of bells can be used for grading, as well as experimentation and composition.

- Vangoa Hand Bells Set 8 Note Handbells Set Colorful Diatonic…
I hope you enjoyed learning about Montessori's Bells. Taking advantage of a child's sensitive period for music can be a real joy.
Cheers and don't forget to subscribe!
How does the sound of the Adena bells compare to the Nienhuis ones? Is Adena’s quality better than the cheapest option you mention?
Many thanks for the awesome content,
Teresa
The sound quality is good, but doesn’t carry quite as much as the Niehues bells due to the structure. It’s a good substitute, if you can supplement activities for the sharps and flats.
If you have other musical instrument activities, you can just work in the set of hand bells.
@Teresa, I got the Adena bells for my home and they do not compare to the Nienhuis bells I had in my classroom. they’re cheaply made and easily breakable.