The Montessori Geometric Solids is arguably one of the most fun and fascinating of all the sensorial materials. These appealing three-dimensional shapes really beckon children to explore them.
What is their purpose, though? They look like fun, but what are children learning through their use? And how do you use them?
In this article, you will learn all about the geometric shapes in Montessori. You learn their purpose, how to present them as a sensorial activity, and you will get some other fun activity ideas that will spark further learning and creativity.
(This post contains affiliate links. Purchasing from these links costs you nothing extra, but helps with our website upkeep.)
What are the Geometric Solids in Montessori?
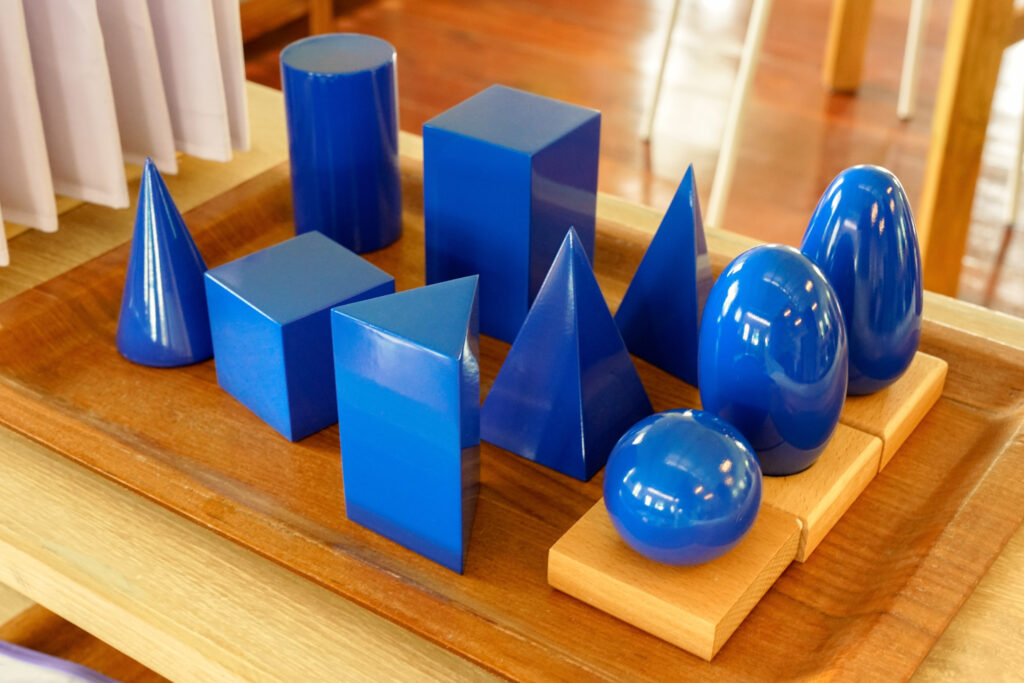
The Montessori Geometric Solids material is a set of 10 wooden 3-D shapes that are sanded smooth and painted blue. They are housed in a wooden box along with stands for the solids that may roll.
The purpose of these 3-D shapes is to demonstrate how 3-dimensional shapes are related to 2-dimensional shapes.
For example, when a child works with the square-based pyramid, they will see that the sides are made up of 4 triangles and the base consists of 1 square.
The shapes included in the material:
- cube
- sphere
- cylinder
- rectangular prism
- square-based pyramid
- triangular-based prism
- ovoid
- ellipsoid
- cone
- triangular prism
This is great preparation for future geometry and trigonometry work, as hands-on exploration of three-dimensional shapes is helpful for gaining a deeper understanding of concepts like angles, planes, and trigonometric functions.
While this material is a preparation for the complicated math work that lies ahead, the Geometric Solids are presented to a child in a simple and fun way – and without any advanced mathematical jargon.
After all, this is a sensorial material and not a math material.
At the time this activity is presented, during the second year of a Montessori primary program, a child may have already worked with some of the shapes during language arts activities, however, that is not always the case.
Children will work with these geometric shapes again during the elementary years when they learn more in-depth physical science and geometry.
Montessori geometric shapes material
While some Montessori sensorial materials are difficult to find for purchase, the Geometric Shapes are not, however finding a well-made set can be a challenge.
Below is a set, that we are finding to be very sturdy.
It comes with all of the solid shapes, stands for the sphere, ovoid, and ellipsoid, and the Geometric Bases, which are used for extension activities.
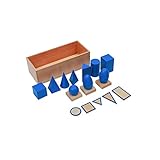
- The box includes five wooden plane figures and three wooden…
- Through observation, cultivate children's concentration; analyze…
Purpose of the Montessori Geometric Solids
- development of stereognostic sense
Indirect aims
- pre-geometry work
Control of error
- visual
Points of interest
- the smoothness of the sold shapes
- the different shapes
- that some of the solids roll and some don't
How to present the Montessori Geometric Solids lesson
Note: This lesson should be presented on a large floor mat. If the child is not ready to learn all of the names of the geometric shapes, it is fine to only introduce the ones with simple names; cylinder, sphere, cone, and cube.
A three-period vocabulary lesson should accompany this activity.
- Carry the box of Geometric Solids to the work mat and place them in a row in the order you plan on introducing them, from left to right.
- Explain to the child that you will be exploring how each solid feels.
- Pick up the shape to the far left and either look away or close your eyes.
- Touch the shape on all sides with both hands, exploring it fully.
- Explain to the child that you are now going to explore how the shapes moves.
- Place the shape down on the mat and slide it and roll it on all sides. Watch how it rolls or tumbles.
- Place the shape back in the row and continue with these 2 steps for all 10 solids.
- Invite the child to preform the activity.
Geometric Solids extension activities
Sorting the Montessori geomtric shapes
Have the child sort the shapes by how they feel and/or how they move. For example, the child can place all the shapes that roll together and all the shapes that slide together.
The child will discover that some of the shapes can both roll and slide and they will often put them in their own category.
Stereognostic activities
Place a few of the Geometric Solids into a bag and invite the child to identify them prior to pulling them from the bag.
You can also ask the child to find a specific solid in the bag without looking.
Play-doh solids
Invite the child to recreate each geometric shape using play-doh.
Matching the solids to their bases
Create a matching activity by making 2 rows, one of the bases and one with solids. Each set should be randomly placed and the child is tasked with matching the solids to their Geometric Bases.
Build a castle
Place all of the solids in the set randomly on the rug and invite the child to build a castle.
Though there is no one correct way to build it, have them notice that the square-based pyramid fits perfectly on top of the cube, etc.
The Montessori Geometric Solids is such a fun material. After working with some of these activities, children will often begin to notice, or even seek out, certain 3-D and 2-D geometric shapes in their environment.
Cheers and don't forget to subscribe!
I really love to use these methods of teaching
How do I get some to buy
Amazon has some that are decent: Here is my affiliate link: https://amzn.to/3XthbMC
Excellent video for the beginners in Montessori…