Montessori teaches math in a hands-on fashion and in order of concrete to abstract. The Montessori Number Rods are one of many examples of this type of sensorial learning.
In this article, you will learn about the Number Rods, the reason behind the red and blue design, and how to present this Montessori material.
By the end of this post, you should feel comfortable demonstrating the use of this math material in a classroom setting or in your home, if you are homeschooling the Montessori way.
(This post contains affiliate links. Purchasing from these links costs you nothing extra, but helps with our website upkeep.)
What are the Montessori Number Rods?
The Number Rods are a Montessori math activity presented around the age of 4.
In fact, they are one of the very first Montessori math materials a child will work with while attending a Montessori primary program.
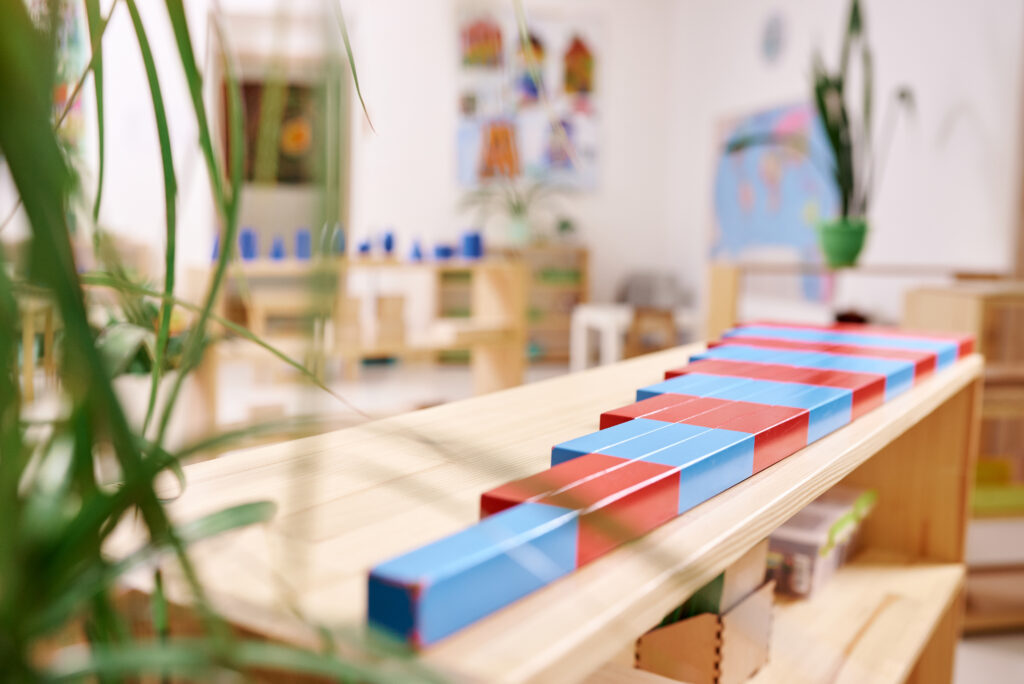
This material consists of 10 wooden rods whose length increases by increments of 10cm rod-by-rod and whose width remains consistent at 2.5cm x 2.5 cm.
The dimensions of this material are the same as the dimensions of the Long Red Rods, a Montessori sensorial material.
The single difference between the Long Red Rods and the Number Rods is the latter is painted red and blue, in alternating increments of 10cm, to signify separate units.
As children work with this material, they gain the understanding that the length of each rod corresponds to a greater number of units.
This teaches children helps children associate quantities with numbers (1:1 correspondence), introduces children to the decimal system, and shows them that single units can be combined to produce various quantities.

- It consists of 10 wooden corner bars from 1 to 10, the size of…
- peration method: 1. Place the rods on the rug on one side of the…
- The second show: the three-stage teaching method teaches children…
Aims of Montessori Number Rods activity
- to show that numbers can represent quantities
- to show that units can be combined to create quantities
- counting to ten
Indirect aims
- a sensorial representation of the decimal system
- to help a child grasp the concept of numbers
Control of error
- the graduated length of the rods (a stair)
- the adult
Point of interest
- the weight of each rod as it's carried to the mat in relation to its length
- the pattern of the rods as they build the stair
The Montessori Number Rods materials, presentation, and extensions
Materials
- Number Rods
- Extra large work mat (make sure to select the correct size if ordering online)
Presentation
- Inviting the child to the shelf, demonstrate carrying the Number Rods to the work mat, one by one, starting with the smallest rod. The shortest 4 rods should be carried with one hand and the remaining rods should be carried carefully in front of the body with 2 hands.
- Randomly place each rod carefully on the mat, allowing a little space between each one.
- Invite the child to help you arrange the Number Rods in order of longest to shortest, like a stair.
- Place the longest rod toward the top of the mat, red segment to the left.
- Find the next longest rod and line it up just below, and flush with, the first rod. The red segment should again be to the left.
- Continue with the subsequent rods, always keeping the red segment on the left side and being sure to place the rods flush with each other, for a proper stair. Be sure to move slowly and be precise with your actions so the child can properly observe.
- Begin the 3-period lesson. (below)
3period lesson
- Take the 1-rod (the single unit, smallest rod) and place it apart from the stair and directly in front of the child.
- Point to the rod with and tell the child, “One. This is one.”
- Invite your child to touch the rod with 2 finger and say, “One”.
- Take the 2-rod from the stair and place it directly above the 1-rod and say, “Two. This is two.”
- Place your pointing fingers on the first segment (red) or the 2-rod and say, “One”. Then place them on the second segment (blue) and say, “Two”.
- Ask the child to touch each segment, as you have done, and count.
- Do these steps again with the 3-rod.
- Randomly pick a number 1-3 and have the child point to the corresponding rod. Repeat this until you feel certain the child understands.
- Point to random Number Rods 1-3 and ask the child, “What is this?”. Repeat this until you feel certain the child understands.
- Place the 3 rods back in the stair.
- Show the child how to carry the rods back to the self, starting with the longest one.
*The 3-period lesson should be done just a few rods at a time and on separate days. When larger number rods are introduced in the lesson, first review the smaller number rods, just to verify the child is understanding.
Montessori Number Rod Extensions
Building a maze
When the child can count to 55, count the total segments of all the Number Rods after they have constructed a maze.
Discrimination of quantities
Select 2 random Number Rods from the stair and place them in front of the child. Ask the child which rod is longer and how many more units the longer rod has than the shorter rod.
“Please Bring Me”
After the Number Rod stair has been built, sit across the room with the child and ask them to bring you a specific rod.
When the child brings it to you, have them count the units with you to verify it is the correct one.
The Montessori Number Rods are actually a fun material for children. The colors on the rods provide guidance, but also a challenge.
The material really “pops” against the standard neutral Montessori environment, which makes it really appealing.
Have you introduced the Number Rods to your child? What kind of activity extensions have you come up with?
Cheers and don't forget to subscribe!